Thursday, December 31, 2015

Mosaics

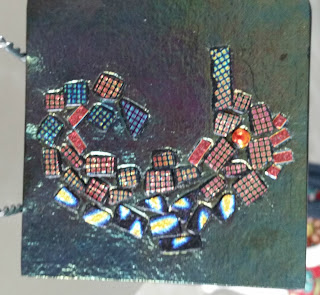
I really enjoy working with mosaics.  I have created several ceramic mosaic pieces and even completed on glass mosaic, but have not done a mosaic piece for fusing.

The first piece I completed was on a 6x6 tile of clear glass.  I formed a fish using several colors of transparent glass in blues and greens.  I cut odd shaped random sized pieces from each color.  Then I filled in around the fish with clear glass cut the same way.  Newy Fagan helped out by filling in some of the larger gaps with smaller clear glass pieces (which enhanced the overall look).  The tile was then fired to a tac* fuse (the glass adheres but doesn't become fully fused leaving texture).
Then, using a mixture of CMC (a cellulose fiber used as a binder in foods like taco shells) and glass powder (black in this case), the glass pieces were grouted.  The tile was then fired again using a tac* fuse  to leave the texture and here are the results.
I wish I had used a different color for the face than dark blue, but I didn't know what it was going to come out looking like!

I really got into this method of creating.  So much so that I used it again twice! during the workshop.
Here is a second piece.  This tile was also created on clear glass.  I used a turquoise powder for the grout.  Then I fused the whole piece onto white glass to give the design more contrast.  
This tile was fired on a full fuse, therefore, the glass is flat.
I like the blue powder, but think a darker blue would give the piece more contrast.

*  Newy has her own firing schedules, so technically, I don't know that she calls the schedule we used as a "tac" fuse.  But for the beginner mind, like myself, I am using terms that can more easily be conveyed.  The terms I use are "slump, tac, contour, and full" when talking about firing schedules.

Wednesday, December 30, 2015

Inclusion

Inclusion is placing glass or other items between glass before firing.  Most of the time, glass is stacked (placed on top of another piece of glass).  Products like Mica powder have to be used between the glass.  Inclusion gives interesting results.  The most notable are the tiny air bubbles created where air is trapped between the glass.  When items are placed between two pieces of glass, a small space is created between the glass.  As the glass warms and begins to fuse together, some of the air from the space is trapped and forms small air bubbles.

I did this piece experimenting with copper mesh, dichroic (metallic looking) glass, stringer, and decals.  I like the shapes, color, and movement of abstract art.

Recently, I tried a piece of copper mesh between float glass (window glass).  I fired it to a contour fire (not quite as hot as a full fire).  I don't really notice any air bubbles in this piece.  What you can't really see above is there are tiny air bubbles inside the mesh of the copper pieces above.

In the piece below, I placed a green grape vine leaf in between two pieces of float glass and fired to a contour.  Most of the leaf burned off and left an ash impression.  There is a small piece in the middle that didn't burn off completely.  When I picked up the glass the small leaf piece slipped.  Had I used a full fire (higher temperature than contour), I believe the entire leaf would have burned off.  I will definitely do this again.  I like the results. 


Monday, December 28, 2015

My personal Joan Miro art

I love the work of the artist Joan Miro.  In fact, when I was in my 20's, I had a signed and numbered print of his.  But as youth goes, it got lost in the moves, etc.  I was too naive at the time to know what I had.  

At any rate, while working with Newy Fagan in her studio, I experimented with combing glass.  This technique involved raking warm glass with a combing tool (similar to a metal chopstick for reference).  

Combing proved to be more difficult for me than I thought it would be.  First of all, I didn't expect the heat of the kiln to be as intense as it was.  I had never had a hot kiln open more than a few seconds to look at the progress of my work.  Also, the glass was not as fluid as I had imagined it to be.  The only experience I had at this point with hot glass was working with molten glass during glass blowing.

In building the glass tile to comb, I used rod pieces that made small circles as well as some string, curly glass pieces that Newy made by pouring molten glass on a piece of sheet metal.

I combed the piece the best I could and then Newy took a go at it.  It turns out, the small round pieces of color were really too small to get much of a design out of with the combing technique.

The piece was left in the kiln to anneal.  The next morning, when we opened the kiln to look at it, the tile had cracked in 3 pieces.  But I loved it.  Why? because it reminded me of the work of Joan Miro.

I brought the pieces home and resurrected the tile by adding a few more colored circles and black curly pieces then firing to a full fuse.

This is what I got.  To many of you, it won't look like much, but to me, I get a good feeling looking at it because of its resemblance to the work of one of my favorite artists.  Joan Miro created work on an entirely different level than this, but the elements are there.

I plan on tac fusing it to a piece of 8x8 clear glass and framing it in black to hang as wall art. the colored pieces that look like they are dripping are the parts that were combed while in the kiln.  Beauty is definitely in the  eye of the beholder!


Joan Miro:

Tuesday, December 22, 2015

Front to Back

I learned something about iridized glass.  It actually is more iridized looking if the iridized side is placed face down for firing.  Not only that, the glass has a texture too it.  The upside is glossy and the back side is matte.

In this project, I made a  4x4" tile on green/black iridized glass.  I believe it was
Spectrum irid 96 -- but honestly can't recall..  I fashioned a seahorse out of dichroic chips and glued them to the iridized side of glass.

Then the tile was placed faced down on some pre-fired 1/32" fiber paper and fired.

The result was beautiful.  Because the irid glass reflects light, the picture doesn't do it justice.

I cannot get the second photo to post straight up.. no matter how I rotate and save it!

Monday, December 21, 2015

Bas Relief day 2

Newy and I did two more bas relief sculptures.

Newy showed me the technique of using the positive images in the fiber mold on the right.  Pieces were cut out and placed on the placemat fiber.  The glass was then placed on top of the fiber paper shapes so it would drape over the shapes when fired.
After firing: 

This piece of glass work is on the way to becoming a wind chime!

  I wanted to use both the positive and negative images in this sculpture.  The fiber mold on the left has both.  On the left, I cut out the sea grass and placed the positive pieces on the right over the fish shape I cut out.  The positive fish shape was placed over the cut out sea grass on the left. The eyes followed the same placement -- positive placed in negative fish and negative left in positive fish.
After firing:

Tomorrow:  Firing right side down. 

Saturday, December 19, 2015

Bas Relief: Day 1

We started our workshop doing bas relief, a method of carving an image that is slightly raised from the flat background.

To do this, fiber paper is used.  Fiber paper is a heat resistant paper made with alumina silicate fibers.   Images are carved out of the paper using an Exacto knife.  The carved image pieces can be used under the glass to leave a raised image in the glass.  The carved out piece can be placed under the glass so the glass sinks or sagged into the vacant areas when fused creating the images.


In the first sculpture (the birds), the carved out sheet of fiber paper was used.  The flat, clear glass sheets were cut to fit the perimeter of the fiber paper and placed on top.
Here are the results.
This is one piece of glass, turned front and back to show you the two different effects of using positive (draping over the fiber paper) and negative (slumping into the fiber paper).
Here, the birds protrude slightly from the background, while their wings (cut out of the original image) are the same level as the flat background and appear indented.  This is the image that results from using the positive (or cut out pieces) technique.
Here the birds are slightly indented from the flat foreground, while their wings (added back to the cut out image) are even with the flat foreground, but look slightly raised.  This image view results from using the negative technique.

Either way, I am happy with the results.  It almost looks like snow in the background.  Those are tiny air bubbles in between the glass.  Two sheets of COE 96 clear glass were used in this project.

I will write tomorrow about the other two pieces.  Visit www.seazeningwithglass.blogspot.com for more workshop stories.

Friday, December 18, 2015

3 days of Warm Glass Heaven

I recently returned from a 3 day Warm Glass Workshop with master glass artist, Newy Fagan.

Newy has been creating in warm glass since the late 70s.  She is most known for developing a technique to manipulate glass while it is in the malleable stage in the kiln.  She creates horse sculptures that stand on their own as a result of this technique.
Newy has her horses in galleries all over the country.  Visit http://www.turqtortsedona.com/Artists/fagan/index.htm to read more about what this gallery has to say about Newy's work.  Visit Newy's web page at http://newyfaganstudio.com/

My 3 days with Newy were very inspiring to say the least.
Newy lives on about 19 acres of land near the Ocala National Forest in Central Florida.  She has two horses (a quarter: Buttermilk, who she fondly calls, "Bubby" and a miniature, Lacy), and 3 dogs (whose names I can't recall, but whose kisses I still feel).  Her studio is fabulous.  When I walked in, I wanted to lock the door and stay for awhile.  The materials were nice, but the artwork dispersed all over the studio was wonderful eye candy. I would look, admire, examine it all day -- and did -- for 3 days.  I pretended I was living the Bohemian life style I always wanted to live!  It was great.

I will tell you more about all we did over the next couple of days.  In the meantime, Google Newy Fagan and learn more about her and her art work.

Tuesday, November 17, 2015

Birds of a feather....

I really like birds.  I like to watch their behaviors and listen to their chirping or in some cases squawking, imagining the conversations they must be having.

I create birds as I imagine them.  These hand crafted, one of a kind glass sculptures are loaded with personality.  They make wonderful gifts for friends, office mates, co-workers, and even yourself.  Imagine  one of these fun creatures propped on a bookshelf and catching your eye after a tiring, less than pleasant day... Instant lift!

The first collection I created is called, "Just Sayin".  Each unique piece is created out of glass and fused together in a kiln, decorated, then mounted on wood with a saying like, " Live in the Moment", that I think fits the birds' personality.  The birds are signed and numbered.

Here is a collage of some of the birds in this series.  The individual birds with descriptions are found in my store, www.seazening.wazala.com and choose the category: Birds


Friday, November 13, 2015

Seazening with Glass

I started a. New blog about my adventures using glass medium.  Follow me on seazeningwithglass.blogspot.com
Seazeningwithglass.blogspot.com

Monday, October 26, 2015

True Sea ZEN ing.

Over the past month or so, I have really gotten into making glass tropical fish, albeit a little whimsical.  As soon as I finish one, I come up with another idea.  

The first couple of fish I created, I did so for fun.  I didn't know what to do with them, so I put steel stakes on them and stuck them in my plants on my deck.  They looked at home in the plants!  It also added color and everyone who notices them, smiles. 


This led to an idea.  I decided to enter an arts and crafts show in December.... my first ever.  These fish would be my product.  I thought they would make cute holiday gifts.  


 Fish are mounted on steel stakes so they can be used to liven up indoor or outdoor plants.  They are a great addition to a patio or deck!
Each creation in "the Bimini Series" is named, numbered, and signed.

These fish are on sale in my store at www.seazening.wazala.com
I take special orders to a degree because each glass sculpture is created as a one of a kind piece of art.  I can make a fish similar to another but it will never come out exactly like it.

I have included a sampling here:
Cassia

Cosmo

Dorothy

Burt

Wednesday, October 7, 2015

3 days of pure fun!

Over this past weekend, I spent three days fusing glass under the tutelage of Master Glass Artist, Wesley Wong.  It was incredible.  I learned so much about fusing, materials, glass properties, etc.  


The focus of the 3 days was fusing 3D objects.  When glass is fused together, it is brought up to 1500-1700 degrees in a kiln where the glass pieces melt into one "fused" piece.  So fusing dimension into glass objects is a little tricky. 

On day one, we made a lily pad and a separate 3D dragonfly.  I am not used to cutting such small pieces!  I like the way it turned out.  Although the picture doesn't show it well, the wings are raised up from the body as if in flight.


On the second day, we made butterflies.  Again the wings are raised.


On the third day, we made gold fish and a 3D tile.  This was the most interesting day to me because I have been fusing tropical fish at home lately. I learned so much.  The fins are all fused at different levels and positions giving the glass movement.  I really like the way the eye turned out too.


In the tile, the seaweed is fused at different levels to give movement and perspective.  The fish is 3D as well.  Check out those lips.  Yep, I got teased about that!

Thanks, Wesley for a great learning experience.

Monday, October 5, 2015

Turn Left!

My husband has a saying that goes like this, "" When facing a wall, turn left."  Basically it means to stop bumping into the wall and try something new!     When I was teaching school, my team mates and I would often tell each other to "turn left" when issues would become more demanding than necessary.

Well, I feel like I have turned left in my creativity.  Last year at this time, I was trying very hard to get Zentangle classes going in St. Augustine, FL.  The interest was definitely there--I would fill the room when I did Library presentations and mini-workshops-- but the paying students were not.  The art of Zentangle has become so popular and many are interested; but, they can buy several books about the technique and the step out instructions to the tangles (patterns).  There is so much to learn from a Certified Zentangle Teacher that goes far beyond what can be gained from reading or looking through a book.  However, when you don't know what you don't know, the reality of the situation rarely matters.

Needing to keep busy, I signed up for Stained Glass classes and made this my creative outlet.  This morphed into fused or Warm glass art.  I am just as excited about this creative outlet as I was about Zentangle!  So, what do I do?  I immerse myself in it.  I still practice Zentangle and love to draw tangles and designs, but working with glass gives me a feeling of tremendous accomplishment.

Therefore, I am morphing from Zentangle into Glass in my blog postings.

I hope you still enjoy reading about Seazenings, even though the concentration has changed.

Look for my post about the 3 days I spent with Master Glass Artist Wesley Wong from Santa Barbara, CA.

Saturday, October 3, 2015

As far as I have gotten

Since I started my stained glass window project, I have also been fusing tropical fish and birds, started a stained glass lamp shade and am presently involved in a 3 day glass work shop.  So needless to say, I have done much on the stained glass window!  

Non the less, the next step is to choose your glass.  Once the glass is chosen, trace the patterns and cut the glass.  After each piece has been cut and grind, test its accuracy with the window pattern layout (the full window pattern).   I have done this much for one window!  BUT... that's it.


It is mostly clear textured glass (called Architectural glass) with spots of color.

Sunday, September 27, 2015

stained glass window next steps

Now that the window design is drawn to size, I lay another sheet of paper on top and carefully trace every line using a new Sharpie pen.
I need to exact copies of the design -- on for cutting and one for a building blueprint.

Before cutting out the pattern pieces, I numbered each piece exactly the same on both pattern sheets.  I drew with a new Sharpie pen because the width of this pen is the width of the lead came that fits between the glass and holds it together.

When cutting out each piece, do so very carefully eliminating the black line entirely.  This usually means every piece is cut individually.  Check the cut pieces with the piece on the building blueprint to make sure it is the same size and fits inside the black lines.

The pattern is numbered, cut, and matched.  I am ready to pick out glass.

This picture shows the patterns are flipped because I am making two identical windows on either side of my front door.


Friday, September 25, 2015

Building a Stained Glass Window...... Step 2

After the initial design is decided, a more accurate pattern needs to be drawn.

I started out by using the measurements and drawing of the initial design.  Then, I got the exact measures of the window and drew that in as the border.  To do this, I subtracted the measurements of the original drawing from the accurate measures of the window opening to find the difference.  Then, I measured that difference (16 cm) from the outside border of the original drawing create a new, more accurate border.
After this, I measured the width of the Zinc came to be used to frame the glass (8cm) and measured this amount from the original border and drew that in.
Then, I extended the design lines out to meet the Zinc came border.

These picture show the 2 additional lines and the design extension.  I apologize for the orientation, but it seems no matter what I do, I cannot get these pictures to post in the north/south orientation.


This was a tedious task for me and took a long time.  Notice the white out lines........

Sunday, September 20, 2015

Making a Stained Glass Window.... from start to finish.

Day 1:

I have decided to challenge myself and make matching stained glass windows for the side lights (windows) on either side of my front door.

I want to share the process with you.

First, I measured the space the windows would cover  (5 3/8" x 62 7/8").  Then I measured and drew out of border.  Then I designed the window.  I ended up doing this process 3 times until I got the design I wanted.

After that, I colored the design the way I wanted the window to look.
That completes the work for day 1.


Saturday, September 19, 2015

Color Me Happy!

In between working with stained glass and fusing, I still tangle.

As I mentioned a few days ago, I started coloring some of the pages that I tangled.  It is a great way to get double the pleasure!

Here are a few more pages of tangles and colors.  My next venture will be creating Mandalas to color.


Thursday, September 17, 2015

Switching paths

  Over the last several months, I have really gotten into warm glass.  Warm glass, also known as fused glass, is an art using cut glass pieces and a kiln.  I am really enjoying this art and plan to pursue it even further.

First off, I love glass -- the smoothness, vibrant colors, and the amazing art that can be made from it.
About 15 years ago, I took a glass blowing class at Jacksonville University.  This was amazing and very difficult.  I admire all glass blowers.  In my opinion, to be able to manipulate molten glass with your breath and movement of the rod is really a testament of artistic and engineering ability.

Glass blowing led to glass fusing.  I am a very tactile person and found that it was easier and more satisfying for me to be able to manipulate the glass with my hands.  I took a class in glass fusing and it sealed the deal.
That was about 13 years ago.

In the meantime, I taught school and created in other ways.  But, I always wanted to get back to glass fusing somehow.  When I retired, I purchased a kiln with a bonus I received from teaching in an "A" school in Florida.  The kiln sat in my garage for a good 7-8 months before I finally got around to firing it up.  I was a little nervous because I really didn't know what I was doing.

During those 7-8 months, I took stained glass classes.  I like creating with stained glass,which is cut and assembled with lead came to make a design.  I love creating with stained glass as well.  I still go to weekly classes and love it.  While there, the studio offered a 2 day fused glass class and I jumped on it!  I learned enough to fire my kiln and give it a shot.  I haven't turned the kiln off since.

Here a a few of the items I have made:


Friday, September 4, 2015

Double Zen!

A few weeks ago, I had surgery on my nose.  My recovery was slow and painful.  I virtually stayed in my recliner for one full week.

During that time, I really became bored and antsy.  I couldn't get up and do much and I would only be awake about 2-3 hours at a time.  

I have a small notebook I had made called, "Time to Zen Out!".  It has twelve pre-strung 3.5x3.5 tiles drawn in it and several blank pages.  It also contains 12 patterns with the step out directions.  The paper is a good Bristol vellum. It is a great little tool for beginning students.

At any rate, I tangled all the pre-strung tiles and tangled a couple of the blank pages.  Now what?


 I decided I was going to color them.  This is a big craze now, so I wanted to see what it was all about.

The result:  DOUBLE ZEN!  Once while drawing and then again while coloring.

Try it yourself.
Here is one design.


Unfortunately, the photos didn't come out well.  
I have literally hundreds of tangled pages that I am going to go back and color.  I may make a copy of them and color the copy because I like the black and white version--especially with shading.  I will post some as I finish them.

Wednesday, September 2, 2015

On the Road Again!


After a few months of down time and "takin' care if business", I am eager to start blogging again.

To start, CZT Adele Bruno's "It's a String Thing #108" on her blogspot, Tickled to Tangle is all about me this week!  Check it out!  

Adele is a friend of mine.  She called last night and asked me what my 3 favorite grid based patterns were.  OK, I thought.  My 3 favorite are her pattern, Lanie; Cubine by Maria Thomas, and Chemestry by CZT MaryAnn Scheblein-Dawson.  I really enjoy drawing these grid based patterns.  

Then she explained to me that she was using one of my strings for her challenge this week and wanted to include my favorite grid based patterns!  I also like Primtemps by Maria Thomas very much, but it isn't grid based.  She included it anyway.  I wish her well on this week's entries.  Thank you, Adele, for thinking of me.

This is the tile I entered into the challenge.  Notice it is mounted on one of Adele's frames!  These are the coolest way to show your Zentangle work.  Check them out on her blog.


Happy Tangling!


Sunday, April 5, 2015

Easter Surprise!

This week's "It's a String Thing" included a string resembling that of an egg.  The tangles used were Coaster, Well, and CO2.  Of course, an Easter egg is not black and white, so I added some color with inktense pencils.


Thursday, March 19, 2015

Busy, Busy, Busy!!

I can't believe how long it has been since I posted.  I have been relatively busy doing new things and have been concentrating real hard on learning!  It takes me a lot of concentration these days.

I am continuing to art journal.  Although, I am realizing how little I know about mixed media.  I was trying out every new style I read about and realized that just buying the materials doesn't mean the style can be reproduced.  I am in the dark about techniques which are very important.  I decided to quit buying and start practicing with what I have on hand.  Although I am reading about techniques, I really need to see it done to thoroughly understand what to do.

Here are a couple of my journal pages with a brief statement of the prompt and materials used.

1.  Music:  What music inspires you?  Represent.
I love big band music.  I drew a large "Ennies" because it reminded me of bubbles (Lawrence Welk), and couples swinging around the dance floor in their swirly dresses.  I used Twinkling H2O water color and Derwent watercolor pencils.

The next prompt was,"What I know for sure."  The only I really know for sure is the nothing stays the same forever. Here I used Twinkling H2O paints and Derwent watercolor pencils.  I attempted to use some alcohol ink, but oviously, they aren't kidding when it is recommended to use these inks on a non porous surface.  I keep reading about Yupi paper, but I am infamiliar with it.


This week's prompt is really just an activitiy which is to draw stacked tangles.  This is more up my alley.  Here I used a Micron 01 pen, a fine point Sharpie and 
Staedtler ergosoft colored pencils (which I think are wonderful).  In fact, I love all Staedtler products.

Have a great week.
I